I ran across this post from the BIM Troublemaker when I was asked by a staff member if we could do 4D simulation in Revit. I normally do my 4D work in Navisworks, but if you have never worked with Timeliner, then that might not be the best choice. The project itself was also much simpler than the example below, so the suggestion as detailed below turned out to be a viable solution.
Monday, November 19, 2012
Schedule Simulation Using Phases - The Poor Man's 4D Timeliner
I have been doing alot of work lately providing supporting graphics
for construction bids. Sometimes the rain-makers like to show potential
clients the sequence of how the building/site will go together.
Rarely do we have the time for a full 4d navis works animation with cranes and all that. Actually having adequate documentation to support such an effort is even less likely! I came up with this B.S. modelling approach based upon a presentation by Aaron Maller at AU 2011 about phases, links, groups and design options.
Sooooo...how did i do this in Revit in one day?

Pretty simple actually.
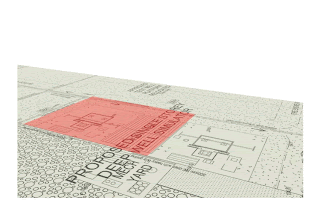
First off, I built a simple model and applied the site plan as a decal to a base plane. This involved saving the pdf as a jpeg, pretty simple in ADOBE.
Then the real work started. I had to liaise with my scheduler. I gave him an excel spreadsheet indicating the different parts of the model that could turn on and off. The scheduler then informed me the timing and durations of the various activities. I rationalized it all so that I could take snapshots of the construction at 2 week intervals.

Then I went into my Revit model and created phases for each interval in the schedule

This part gets tricky. i created a phase filter called "Timeline" specifically for the task at hand. I probably could have used "Show Complete" but I like starting fresh in case i need to tweak things.

After settling on a 3d camera view I liked, I locked the view and set the view template. Then i copied it a bunch of times, one view/snapshot for each phase.

Now it just gets tedious...follow this step by step:

Now you can check each of the snapshot views to make sure they look right.

To generate the images, i used the INTERACTIVE RAYTRACE display option.

I let it process for about 1 minute per shot. then i stopped and saved the image. Revit will save the picture to the RENDERINGS folder in the project browser.

Export all the images as you would for any jpeg renderings. Then i compiled all of them into an animated GIF file. Instructions for this process can be found here:
HOW TO MAKE AN ANIMATED GIF
And thats it....enjoy. See y'all at AU.

Rarely do we have the time for a full 4d navis works animation with cranes and all that. Actually having adequate documentation to support such an effort is even less likely! I came up with this B.S. modelling approach based upon a presentation by Aaron Maller at AU 2011 about phases, links, groups and design options.
Sooooo...how did i do this in Revit in one day?

First off, I built a simple model and applied the site plan as a decal to a base plane. This involved saving the pdf as a jpeg, pretty simple in ADOBE.
Then the real work started. I had to liaise with my scheduler. I gave him an excel spreadsheet indicating the different parts of the model that could turn on and off. The scheduler then informed me the timing and durations of the various activities. I rationalized it all so that I could take snapshots of the construction at 2 week intervals.

Then I went into my Revit model and created phases for each interval in the schedule

This part gets tricky. i created a phase filter called "Timeline" specifically for the task at hand. I probably could have used "Show Complete" but I like starting fresh in case i need to tweak things.

After settling on a 3d camera view I liked, I locked the view and set the view template. Then i copied it a bunch of times, one view/snapshot for each phase.
Now it just gets tedious...follow this step by step:
- Work in an default 3d view, not one of your snapshot views. Make sure phase filter is setup to "Timeline" Set the default 3d view's phase to the final phase, in this case "Phase 14"
- Make sure the model is finished
- Assign materials to the "COMPLETE" elements
- Change the construction phase setting for all these elements to the final phase, in this case "Phase 14"
- Copy all the elements off to the side a memorable distance like 1000m
- Create a material to represent a "CONSTRUCTION" phase. In this exercise, I chose transparent red
- Assign the "CONSTRUCTION" material to all the copied elements
- Change the phase of all the copied elements to to the initial phase, in this case "Phase 1", they should all dissappear
- Change the default 3d view phase to the initial phase, in this case "Phase 1". The red "CONSTRUCTION" elements should appear, while the "COMPLETE" elements go away.
- Move your "CONSTRUCTION" elements back into place.
- For all "CONSTRUCTION ELEMENTS", change the "Phase Created" and
"Phase Demolished" variables according to the grouping in the schedule
spreadsheet.

- For all the "COMPLETED ELEMENTS", change the "Phase Created" variable according to the grouping in the schedule spreadsheet, while setting the "Phase Demolished" variable to none.


Now you can check each of the snapshot views to make sure they look right.

To generate the images, i used the INTERACTIVE RAYTRACE display option.
I let it process for about 1 minute per shot. then i stopped and saved the image. Revit will save the picture to the RENDERINGS folder in the project browser.
Export all the images as you would for any jpeg renderings. Then i compiled all of them into an animated GIF file. Instructions for this process can be found here:
HOW TO MAKE AN ANIMATED GIF
And thats it....enjoy. See y'all at AU.


