Showing posts with label Curtain Wall Panels. Show all posts

Wednesday, July 27, 2016

Managing Curtain Walls in Assemble Systems


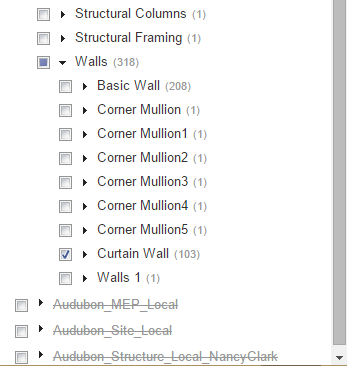
Curtain Wall families in Revit are indicated by 3 dashed lines at the perimeter of the system. Each Curtain Wall system contains multiple components: Curtain Panels, Curtain Mullions and the boundary condition of the overall Wall System. Upon publishing to Assemble, a Curtain Wall System is represented in Assemble graphically displaying the Curtain Panel and Curtain Mullion components. The boundary condition for the overall Curtain Wall system is not supported, but the summary Quantity is published in the Walls Category. This document outlines how to manage Curtain Walls in Assemble.

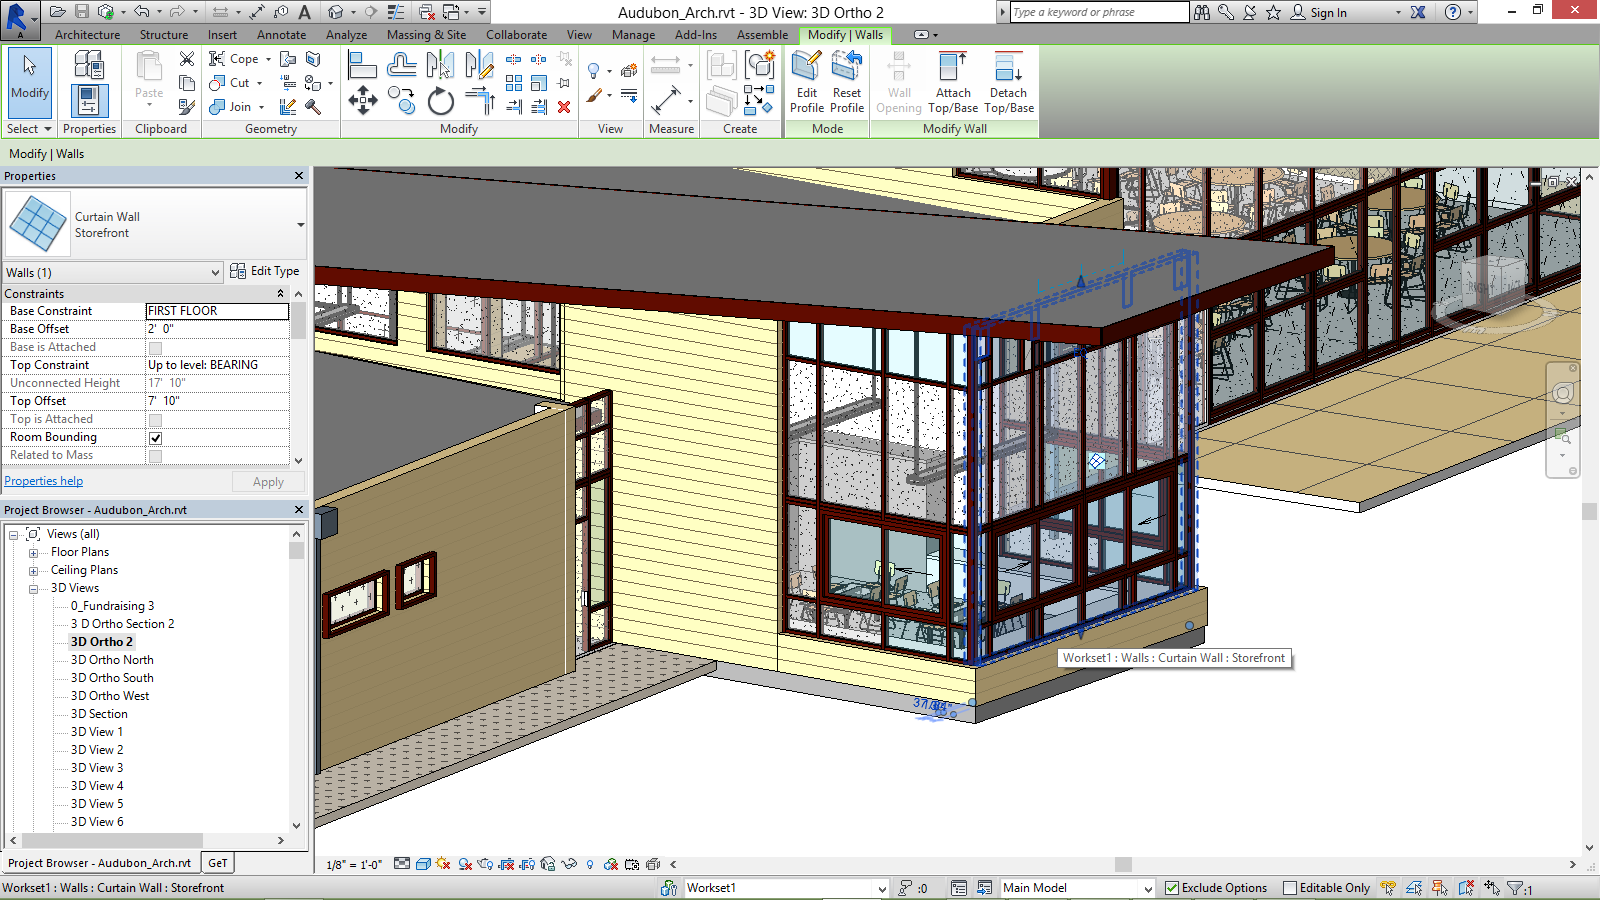
Figure 1: Curtain Wall System highlighted in Revit 2015.
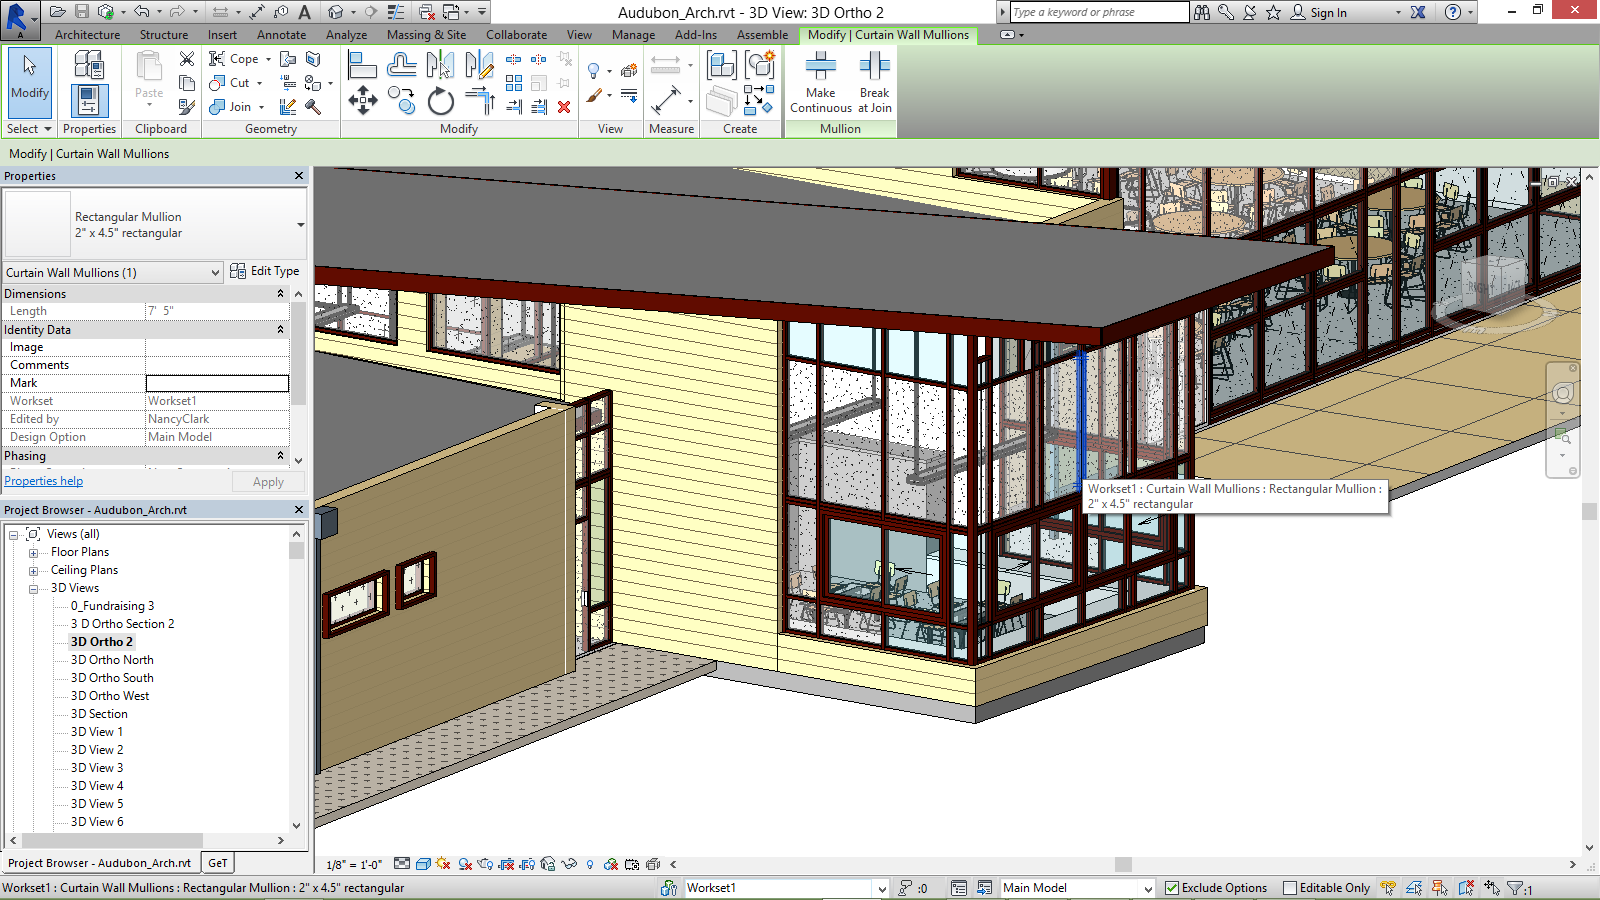
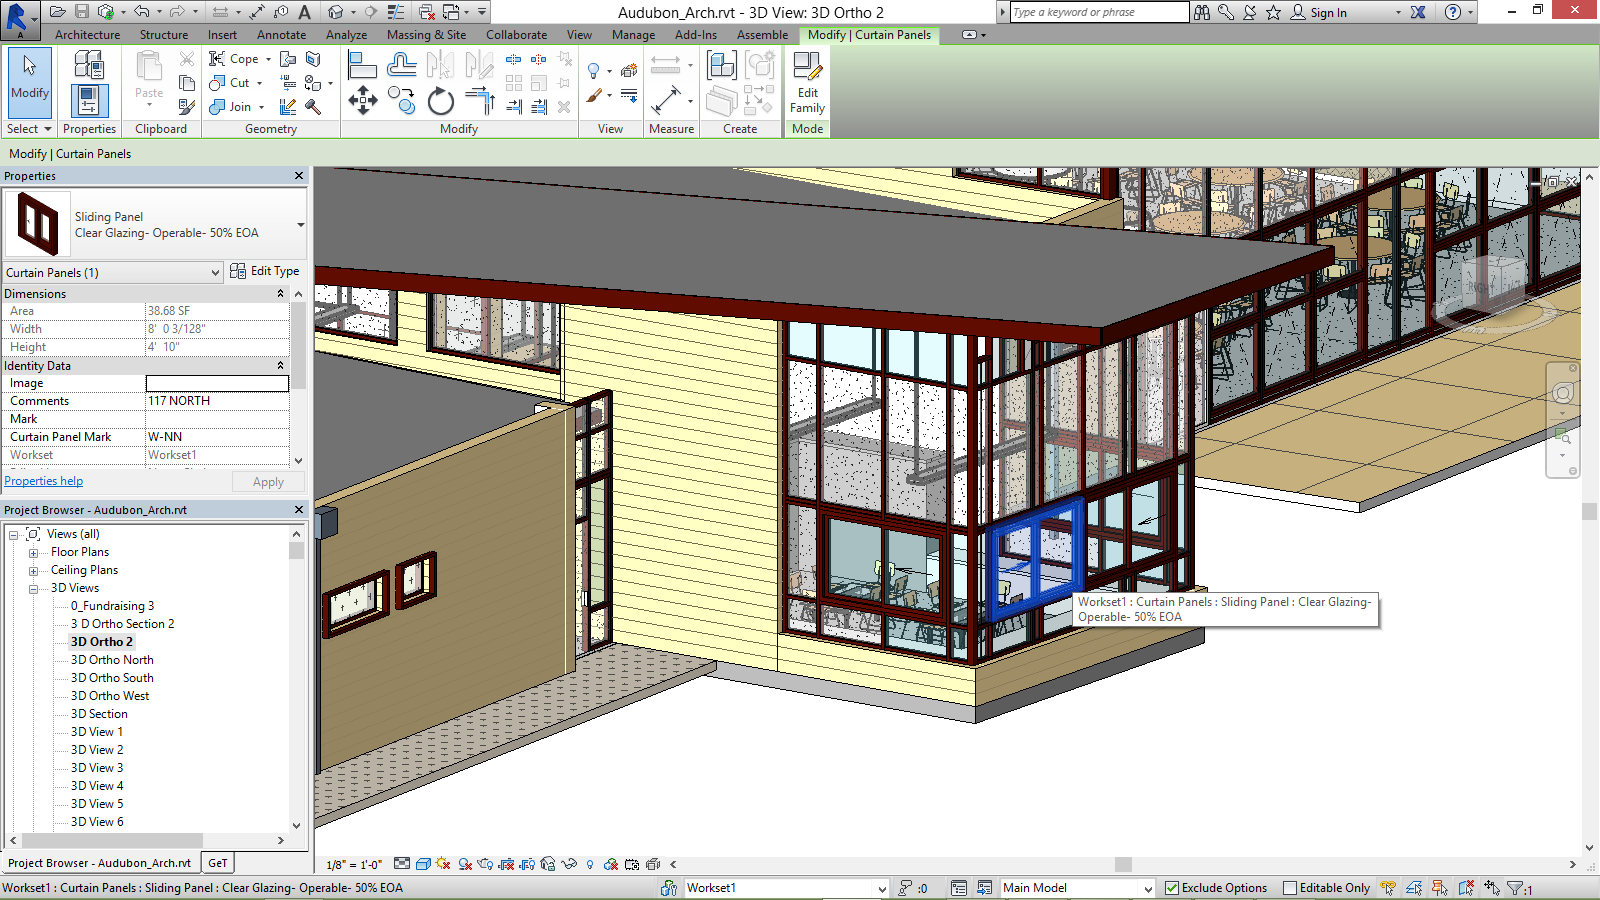
Figure 2: Curtain Panel (a singular component in the Curtain Wall system above) and Curtain Mullion (at right).
The following workflow can help the VDC/BIM Manager, communicate the various curtain wall quantities and their relationship to the estimator.
Step 1:  Create a View of the Curtain Panels, Curtain Mullions and Curtain Wall.
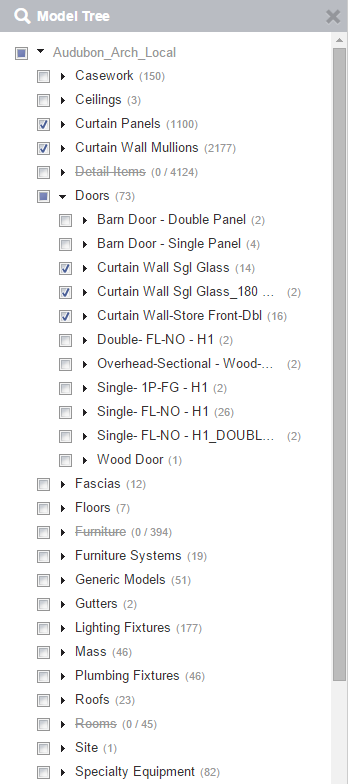
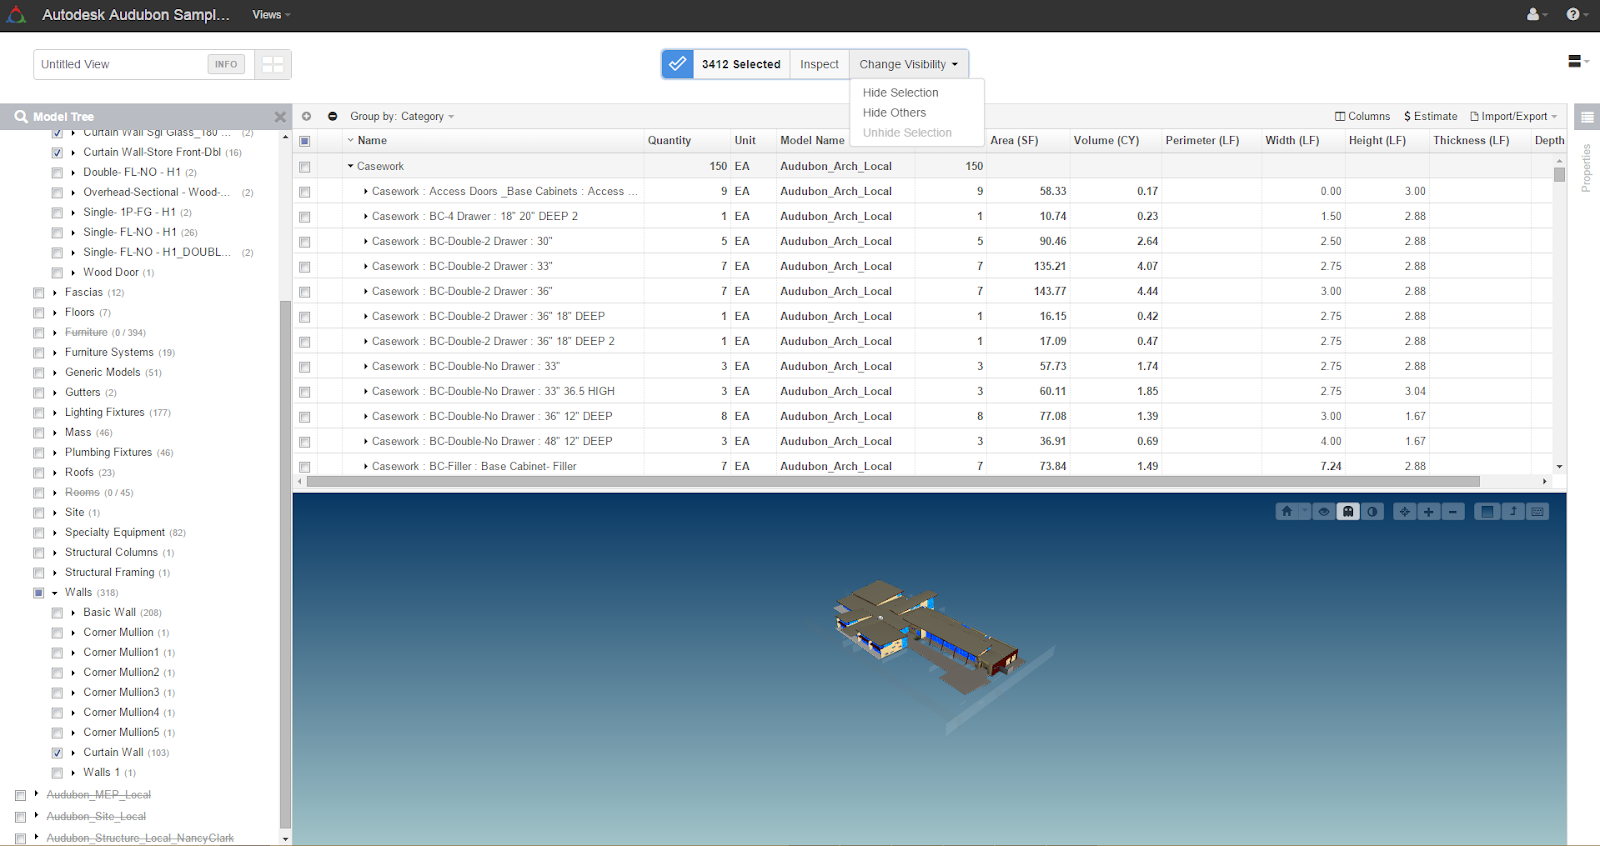
Select all Curtain Panels and Curtain Mullions. Choose the Door families labeled Curtain Panel or Storefront. Finally choose all families in the Walls category labeled Curtain Wall. Then choose Hide Others from the Selection Bar.


Step 3: Group the View by Host ID
  1. Click on the Dropdown next to Group by in the Model Inventory header.

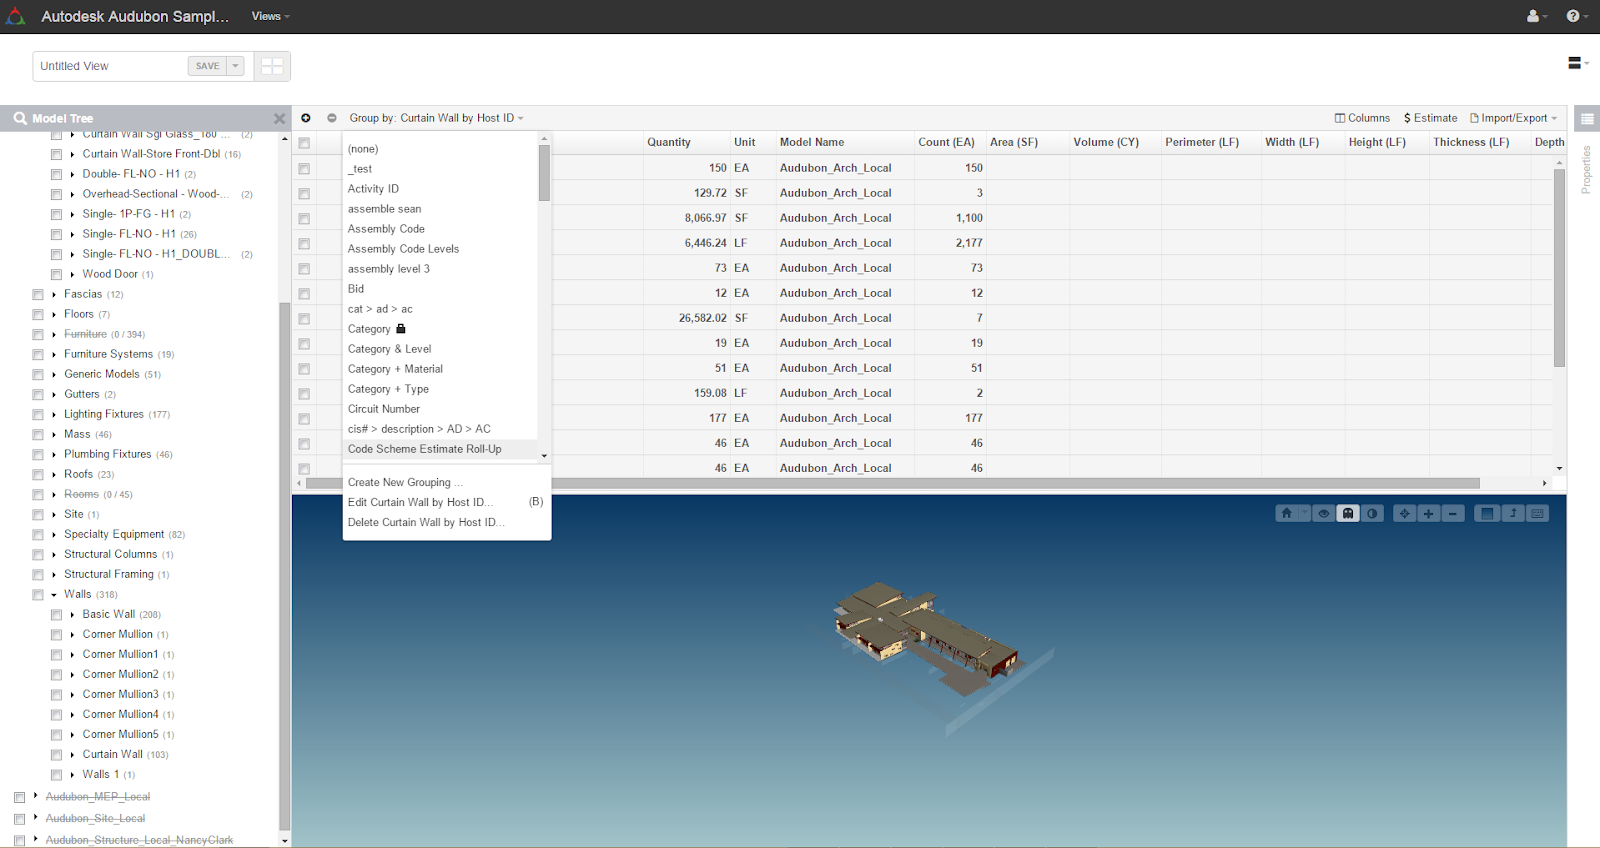
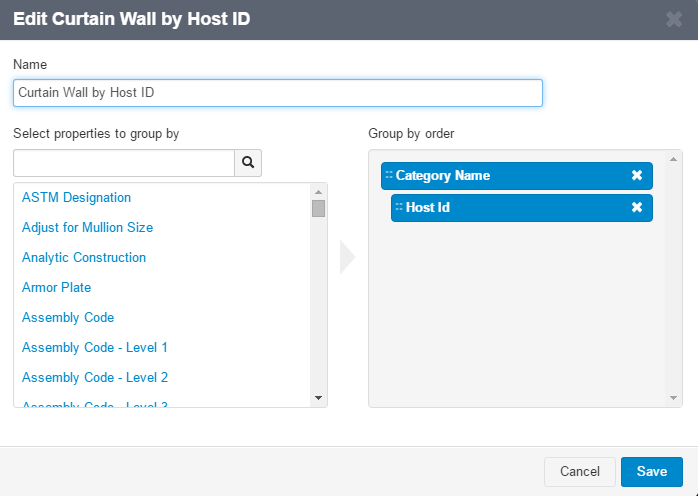
  1. Click Create New Grouping to make the following Grouping:

Step 4: Save the View
  1. Click on the Save button to save changes and name your new view.


Step 4: Review the quantities for Curtain Panels and Curtain Walls
  1. Now in the Curtain Wall View, you can associate the total square feet of Walls: Curtain Wall: Storefront with the Curtain Panels and Doors that have the same Host name of Storefront. In this example the total area of the Curtain Panel labeled Storefront is 7865.69 SF and the total area of Curtain Wall doors is 402.50 SF for a total of 8,268.19 SF (See Figure 4 for details). The corresponding calculations of Walls: Curtain Wall Storefront is 9,321.10 as it represents the total area of the system, including Curtain Panels and Curtain Mullions. Assemble displays both values so that you understand the overall area of a system and the area of just panels or the lineal ft of just mullions.
NOTE: The Walls Category is a redundant quantity and does not display in the VIewer. It represents the total area for a particular system type. Curtain Panel and Curtain Mullions have quantities associated with their geometry individually. Both are displayed at the request of our customers and provide you with two ways to view the same information.
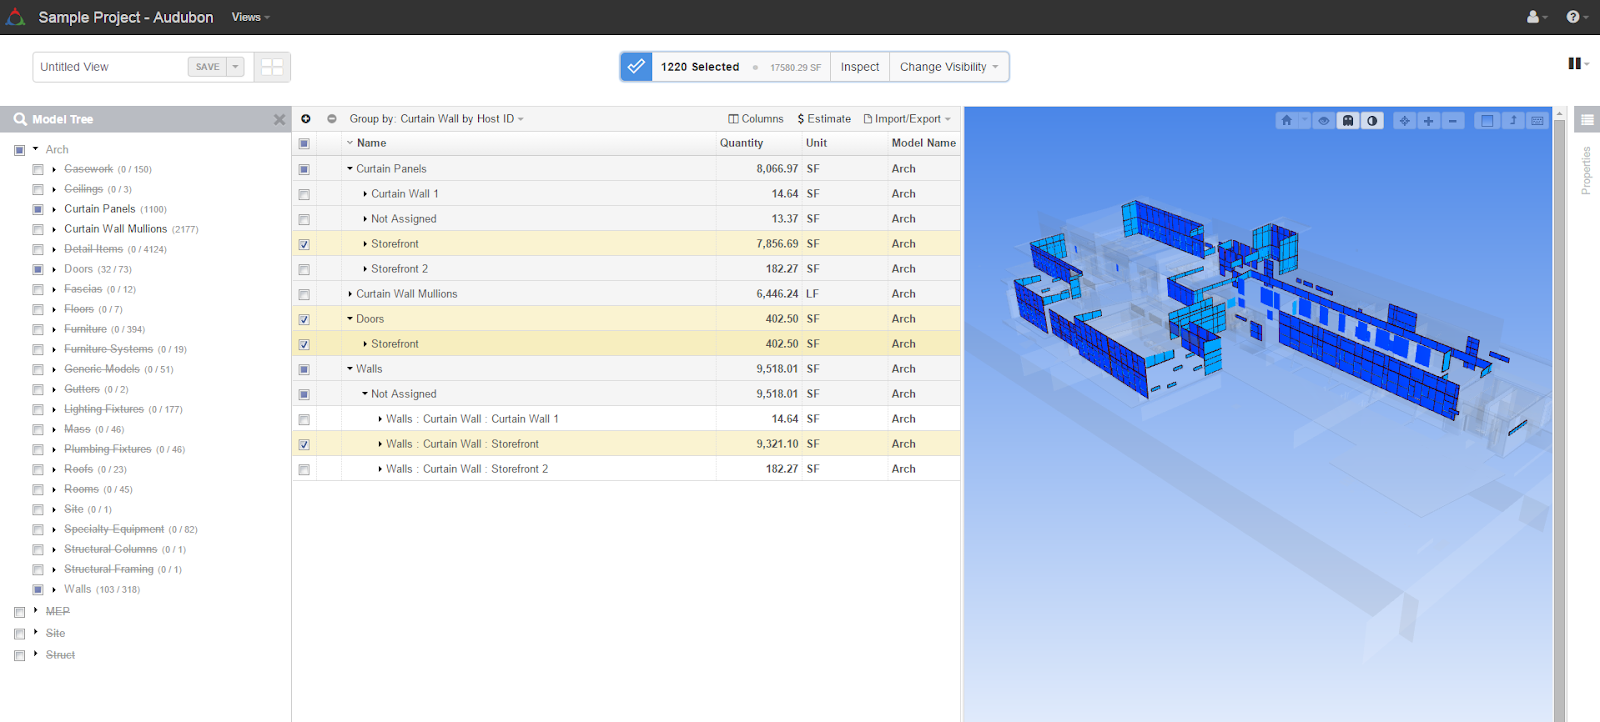
Figure 3 - View of Curtain Walls

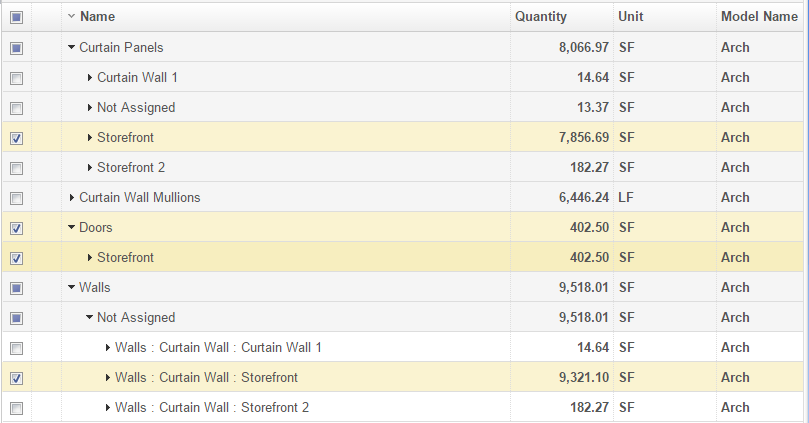
Figure 4- View of Storefront Quantities

Sunday, May 8, 2011

Family Abuse - Curtain Panel By Patterns Edition - Repost


This post is from the BIM Troublemaker that one of my co-workers shared with me.

Family Abuse - Curtain Panel By Patterns Edition


I cut my teeth in this BIM thing using Architectural Desktop (ADT).  I loved that program a lot.  I still have a real fondess for it, but that's a moot point for this column.  At my first AU conference, i saw a presentation about using RAIL objects to model any type of repetitive, linear element.  I loved the concept and quickly started playing around.  But all that is old news now...

I struggled for a while trying to figure out how i could use the same "RAIL" logic of modeling repeating linear elements in Revit.  It seemed to me that the rail tool in Revit is a bit more rigid in what type of objects it accepts....maybe i am not looking close enough...and then one day POW! It hit me like a bolt from the blue.  CURTAIN PANEL PATTERNS could be the way!

First thing I did to test out this theory was to create a reference line CURVE BY POINTS and then hit the CREATE FORM button to give myself a surface.  I divided the surface and it looks like this:


Because i made sure to use a Reference Line, I can grab any of the driving points and adjust the curve manually later.  These points could also be parameter driven if you want that kind of control.


The next step involves creating a Curtain Panel Pattern based upon the RECTANGLE template.  Zach and Robert Manna did a great presentation at AU last year that involved a good discussion on how to control the behavior of the reference points.  You will need to understand this behavior in order to make this type of model work.  Go download the handout here:

Au Bon Panel: Baking Your Own Adaptive Components and Panels with Revit

The bit I am concerned with starts on page 6.  Have you looked it over?  Good.
In this case I am making a linear canopy.  I like using nested objects so I went ahead and made a generic mass to act as the repeating vertical element.  2 things to notice in the image below:

1) The object is being built in plan.  This is because of how i planned to mount it on the reference planes in the curtain panel.  The lesson is that in this exercise UNDERSTANDING YOUR HOST PLANES, HOST POINTS AND ORIENTATIONS ARE CRUCIAL!!!

2) The top mass is transparent so you can see the line work I drew.  These lines will control the shape and location of my glazing panels and horizontal mullions.  Its easier to set up any desired sectional parametric relationships hereTrust me!

Now if you have read Zach and Robert's Handout, you will be very clear of about whats going on in the picture below.

1) I set up the offsets for the reference points as they describe.
2) Then i connect the offset point to the adaptive point upon which it is hosted with a reference line.
3) Host a point on that reference line
4) Host my generic mass on that point, in proper alignment.
5) Create reference lines on any section guidelines and create desired horizontal forms.
6) Try again because I did it wrong the first time (repeat as needed)


Load that into the curved surface family, apply it to the divided surface and once you have done it all properly... you'll get this:


When I did mine, i noticed that the end pieces looked funny.  That condition went away when i adjusted the border tile settings:


And once you get it sorted in 2d, you can pull the curve's driving points vertically....

Download the family here:
Curtain Panel Canopy Model.rfa

And the stage is now set for The REVIT ROLLER COASTER Plug-in...I hear its in the works for the 2013 release...

Is anyone using Deep Space for analytics? https://www.deepspacesync.com/