As mentioned in the previous post, the Revit Model Checker comes with several per-defined sample check files. In this post, we will walk thru the setup and configuration for the sample check files.
 |
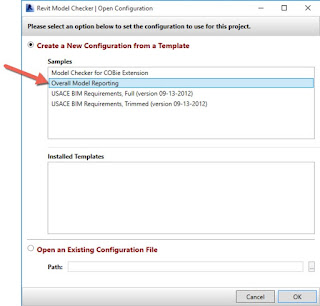
Figure 1 - Revit Model Checker Sample Check Files
|
One installed, the Model Checker panel is added to the Add-Ins Ribbon tab within Revit.
 |
| Figure 2 - Model Checker panel in Revit |
Included with the Model Checker are four sample rule sets (Figure 1) that provide sample configurations for checking yours models for:
- COBie Compliance
- General BIM Modeling Checks
- Comprehensive and Quick USACE BIM Requirements checks
To load and use one of these sample rules:
- With a model open within Revit, navigate to the Add-Ins Ribbon tab.
- Click the Configure button from the Model Checker panel of the Add-Ins Ribbon tab.
- From the configuration dialog, click Open.
- Choose Open An Existing Configuration File (Figure 3) from the Open Configuration dialog, and navigate to the one of the sample Model Checker Configurations (.mck) file.
- Click OK to return to the Revit Model Checker for USACE v4.0 dialoig.
 |
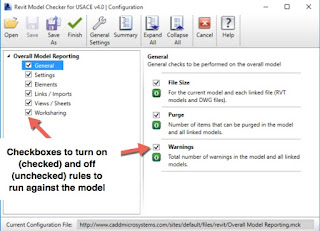
| Figure 3 - Revit Model Checker Configuration dialog |
Now that we have a sample Model Checker Configuration file loaded, we now have the ability to modify the default settings for our particular project. To configure the Model Checker (assuming the Configuration dialog is open):
- Choose modules to be run by selecting corresponding check boxes. All available checks are enabled with a check mark by default.
- Expand individual modules to choose specific checks, and level-of-detail of applicable.
- Click Save As to generate a new Model Checker Configuration (.mck) file that includes configuration changes for units, enabled and disabled checks, and the level of detail settings associated to select checks.
 |
| Figure 4 - Configuring Rules |


No comments:
Post a Comment