Thursday, February 5, 2015

Revit to Navisworks and Missing Paramaters

When exporting data from Revit to Navisworks, sometimes parameter data may not appear. For example, Figure 1 shows a pipe create in Revit along with a sampling of some of the parameters associated with the pipe. Figure 2 shows the pipe in Navisworks (exported using the Revit Navisworks exporter).


Figure 1 - Revit Parameter View for Pipe

Figure 2 - Navisworks Parameter View for the Selected Pipe
The first reason that the parameters may not be coming across from Revit is with the export settings. Make sure that Convert element parameters and Convert element properties are both enabled.
Figure 3 - Revit Navisworks Exporter Settings Dialog
The second potential reason for parameters not coming across or displaying is due to the selection resolution (Figure 4) in Navisworks. When you select an item(s) in Navisworks, it doesn’t know what level/area of item to start selecting in the project browser. It could be at the model, layer, instance, group, or geometry levels. Navisworks provides six different resolution settings (From the Navisworks Help):
Figure 4 - Navisworks Selection Resolution Options

  • File. Makes the object path start at the file level; as a result, all objects at the current file level are selected.
  • Layer. Makes the object path start at the layer node; as a result all objects within a layer are selected.
  • First Object. Makes the object path start at the highest level of objects below the layer node, if applicable.
  • Last Object. Makes the object path start at the lowest level of objects in the Selection Tree. Autodesk Navisworks looks for composite objects first, and if none are found, the geometry level is used instead. This is the default option.
  • Last Unique. Makes the object path start at the first unique level of objects (not multiple-instanced) in the Selection Tree.
  • Geometry. Makes the object path start from the geometry level in the Selection Tree. 
  •  
For example, Figure 5 shows a single element selected with the Selection Resolution set to Geometry. Note that in the project browser, the geometry level is highlighted and we have limited parameter data available in the properties palette. Figure 6 shows the same pipe selected as in Figure 5, but with the Selection Resolution set to First Object. Note that in the project browser, the selection starts at the highest level for the object selected (the pipe) and in the properties palette we have much more data about the object.
Figure 5 - Geometry Resolution Setting & Properties Shown

Figure 6 - First Object Resolution Setting & Properties Shown

Wednesday, February 4, 2015

Revit to BIM 360 Glue improvements

The Beyond Design blog team has posted some interesting Revit to BIM 360 Glue improvements. It's now possible to export from Revit to Glue using a .NWC file rather than a .DWF file.

Tuesday, January 13, 2015

Register Today - Spring 2015 BIMForum - Transforming Deliverables


REGISTER TODAY!

TRANSFORMING DELIVERABLES
The "deliverable" is a mechanism used to relay instructions and information from one party to another in a useful format. A common opinion is that the "I" in BIM is of utmost importance, but it is also the most overlooked. How can our industry better harness the information we are creating with BIM tools? What forms should these new deliverables take? Do traditional formats still work? Are there 'new and improved' deliverables on the horizon?

Presentations will address the following topics:

- Using BIM, but still improving traditional deliverables
- Creation of innovative model-based deliverables
- Managing the risk of model sharing
- Do better deliverables yield better results in the field?
- Are owner requirements evolving to allow new deliverables?
- Can BIM deliverables improve AHJ reviews?

CALL FOR PRESENTATIONS STILL OPEN
click here to submit
 
Submission Deadline January 15, 2015


Registration Fee:
Before March 18, 2015
$545.00
After March 18, 2015
$650.00
Want to bring your whole team? Email duntonr@agc.org about group registration discounts!

Interested in Exhibiting or Sponsorship?

Monday, August 4, 2014

Revit OpEd: Review Warnings Show and Worksets

Revit OpEd: Review Warnings Show and Worksets: We can choose which worksets are open (visible). When we choose to take advantage of that it affects what we see in views naturally. When we...

Monday, July 21, 2014

Repost: BIM & BEAM: Direct Analysis Method Whitepaper

July 01, 2014

Direct Analysis Method Whitepaper

I am happy to share with you next whitepaper: Direct Analysis Method
Designing for stability is a critical requirement for all steel structures, but implementing the latest stability analysis methods into engineering workflows can be challenging and have significant negative effects if done improperly.  With the release of the AISC Specification for Structural Steel Buildings (AISC 360-05) in 2005, AISC introduced the Direct Analysis Method and imposed new requirements for stability analysis and design. These changes represent a fundamental shift in how engineers consider destabilizing effects, shifting the accounting of these effects from member capacity calculations to member demand (analysis) calculations. Utilizing the Direct Analysis Method results in greater accuracy, simplified member capacity calculations, and greater applicability to more types of structures.

Read more.


03

Monday, July 14, 2014

Revit Warnings: Structural usage set to Non-bearing


A structural framing element is attached to a wall whose Structural Usage is set to Non-bearing.
This means that you have used a structural element such as a beam and it is attaching to a wall whose structural usage is set to Non-bearing. The following table lists the automatic Structural Usage settings for beams, based upon the elements in which they are being connected. There are a couple of different methods to correct this problem, each with pros and cons. The method used would be dictated by a number of factors, including determining if the structural elements(s) are truly structural elements or some type of faux treatment.
#1: Change the Structural Usage of the Wall from Non-bearing to Bearing by selecting the wall and bringing up the Element Properties dialog and changing the Structural Usage to Non-bearing. One of the downsides to this is if you are working with a structural engineer that using Revit Structure this wall will appear as a Bearing wall. If you are working with a structural engineer using Revit Structure, this would NOT be the appropriate method.


If the elements that have been modeled are not being used as structural elements, but being used as some sort of faux treatment, then consideration should be given to remodeling the framing using a non-structural elements.

Sunday, July 13, 2014

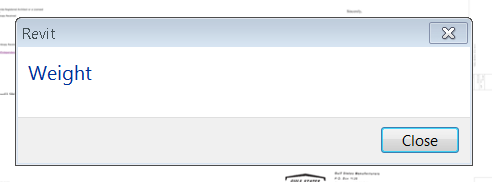
Weight


If you are working in Revit and ever run across this "Weight" warning, do not fear, Revit is not making any comments about your actual weight.

It's the first time I have run into this warning myself. After doing some research and reviewing the journal file, the problem appears to be a connectivity issue. The warning seems occurs when you have a file not saved issue. If this is the case, rather than trying to Save to Central, trying saving just to your local first and then Save to Central.

https://blogger.googleusercontent.com/img/b/R29vZ2xl/AVvXsEiamSGorKhixZZ1XkapVeA6XAgacqcMHP7wyG31bwkV6XdvUh6-VJt2oBKxp_COIlAFd6OMVuURJiUz86jJ4g0YQ_no5L2oN_rEwmIUxgiVD_imH1UHubfy24Qh5qDmhoPM-NtUG_K1PD4S/s1600/2014-05-26_13-05-44_01.png

In the case that this actual warning occurred, the user has just loaded in a couple image files and was trying to STC from a remote connection.

Monday, July 7, 2014

Autodesk Revit Model Review

I have been working on a number of different projects with a wide array of client standards. Making sure that models are complaint with those standards can be difficult. Fortunately, Revit has something called Autodesk Revit Model Review. It's a tool that is available as part of your subscription package that, in short allows you to run checks against your model files. Some examples of the checks you can preform are:
  • Model Naming
  • Report Walls are unconnected to a level
  • Number of Filled Regions
  • Text heights that are different from approved heights
Autodesk Revit Model Review has been around for awhile and I believe that it was originally developed by IMAGINiT and I think it is one of the most under utilized tools.

I have been spending a lot of time developing new checks for Model Review, so I thought I would share some of those. The first check I thought I would share is finding the number of In-Place families in a project.

Begin by opening up the Revit Model Review Manage dialog to start developing or editing existing check files. From the Check pull-down menu, click on Add to add a new check. Then click on Standards followed by Number of Elements to create a check that will find elements we are search for.


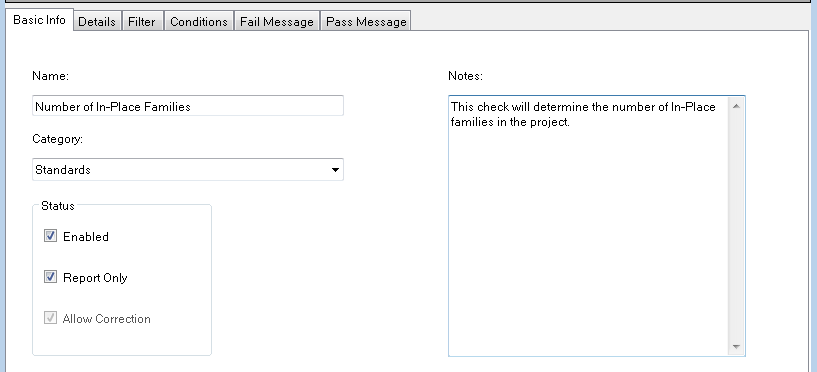
The first thing we need to do is edit the Basic information about the check. In this example, I provided a more descriptive name for the check, provided some general notes about the check and under status I checked the "Report Only" checkbox.


The status section shouldn't be overlooked. There are three options:
  • Enabled: When this option is NOT checked, the rule is disabled, meaning it will not be used.
  • Report Only: The majority of checks have a pass or fail set of conditions. In this particular case, I just want to report the number of in-place families in the project. This example, does not have a set of conditions to either pass or fail.
  • Allow Correction: Some checks provide for an option that attempt to correct the model. When this option is enabled a "wrench" icon in the fix column in the Check Results Browser as shown below. Clicking on the wrench button will attempt to correct the issue. I personally do not use this option, as I am not sure how the tool will correct the issue. If the check you are creating does not allow for auto correction, then the option will be grayed out.
 
 
The next step is to switch to the Filter tab. This is where we will define which families are going to be tested. In the Family Category dropdown, select Is In Place.


When you select Is In Place, TRUE will automatically be selected. You then click on the Add button to create the filter.


The last step is to switch to the Pass Message tab. In this section you can customize the message


The most important step is to save the file and make it available to Check routine. At the top of the dialog, click the Profile button and then Edit. You will then be able to add the check file you just checked to the list of available checks.


When you run the actual check, you will get results similar to below if you have in-place families in your project.
 

Friday, July 4, 2014

Autodesk Revit Model Review - Admin Access Requirement

If you have tried using Autodesk Revit Model Review to either edit and existing checkset or create a new one and you are not a system administrator, you might have run into two known issues. Autodesk Model Review is installed in the \Program Files (x86)\ folder and that requires admin access to edit (thanks for pointing that out Daniel - I should look at the Help file more often). Another issue with the installation is the default output folder (location where checks results will be saved to) is set during installation to the installing user’s documents folder, which as only admins can install, is a folder which the normal users don’t have access rights (thanks Brendon).

If you are not an Admin, you can still create and edit checksets. You just can't save then to the default folder. If you want to run those against models though, we have to alter the ModelReview.config file and that is going to require Admin access.

To change the location of the output file and add a new checkset, open the Model Review config file located:

C:\Program Files (x86)\Autodesk\Autodesk Revit Model Review 2014\ModelReview.config

Edit this file as follows:
  •  Line 9: Copy line 8 to add the information for your new check. I recommend location the check file (.bfc) on a sever or other location that you have read/write access. This will permit you to edit the check file as needed., then copy the physical file to this folder
  • Line 11: Edit the <OutputPath> entry to a location accessible to normal users.


You can then save the ModelReview.config file to a location that you have read/write access. You will then need to find someone in your organization with Admin access that can replace the original Modelreview.config with the file you just created.

Tuesday, July 1, 2014

Autodesk Project Skyscarper

Project Skyscraper to bring Revit Collaboration to the Cloud  
Project Skyscraper is a technology preview for Revit that will allow architects, engineers and contractors to collaborate on the Autodesk 360 cloud platform, eliminating the need for firms to invest in costly IT set-ups.
With collaborative workflows across teams spanning different firms and locations becoming more and more common, architecture, engineering and construction firms are looking for ways to simultaneously co-author models across firewalls. Project Skyscraper allows project stakeholders from multiple companies or locations to concurrently author a model using the BIM process.  Extended teams can view, search and provide feedback on project models on any device. No more emails with attached PDFs.
1Project Skyscraper enables team members in different firms and sites to work on the same project models simultaneously.
Several customers are already testing Project Skyscraper in a production beta environment, and we currently expect the full commercial release of the software by the end of this year.
 “Our customers have told us that technology can actually get in the way of their collaborative workflows.  They end up exchanging data inefficiently, with email as a lowest common denominator for communication among the team.  We built Project Skyscraper and integrated it with Autodesk 360 to break down those barriers and let the team focus on delivering high quality buildings on time and on budget,” said Kyle Bernhardt, Cloud Services Product Line Manager, Autodesk.  “Our production beta customers are already reaping those benefits, and we look forward to delivering an entirely new form of collaboration to our AEC customers.”
Autodesk will host several Project Skyscraper “Open House” sessions later this summer to allow more customers to test this new collaboration system. Customers interested in participating can go here to learn more.
2
Project Skyscraper runs on the Autodesk 360 platform, providing users with access to additional cloud services such as simulation and rendering.
- See more at: http://inthefold.autodesk.com/in_the_fold/2014/06/autodesk-at-aia-2014-project-skyscraper-dynamo-advance-the-future-of-bim-for-architects.html#sthash.ZQ16C3tJ.dpuf

Is anyone using Deep Space for analytics? https://www.deepspacesync.com/